D006D-V3 Variation is Working
Sunday, July 1st, 2012I just got the board running and it’ll be shooting a particularly boring movie overnight to make sure my timing is ok.
I just got the board running and it’ll be shooting a particularly boring movie overnight to make sure my timing is ok.
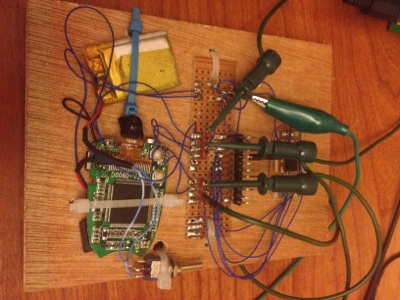
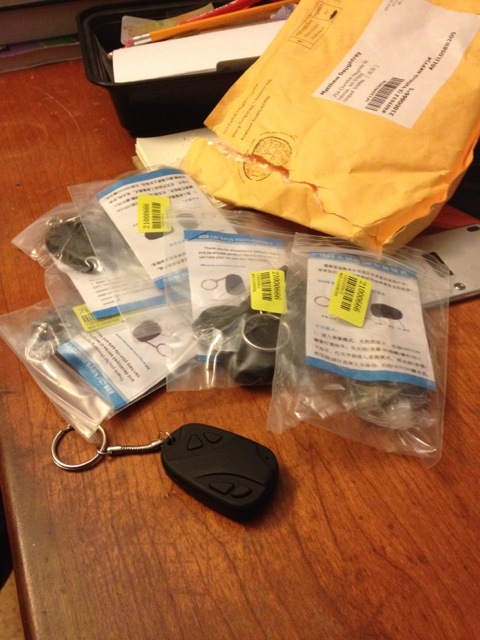
So called because that’s what’s printed on the PCB, this is one of the units I received a few weeks back.
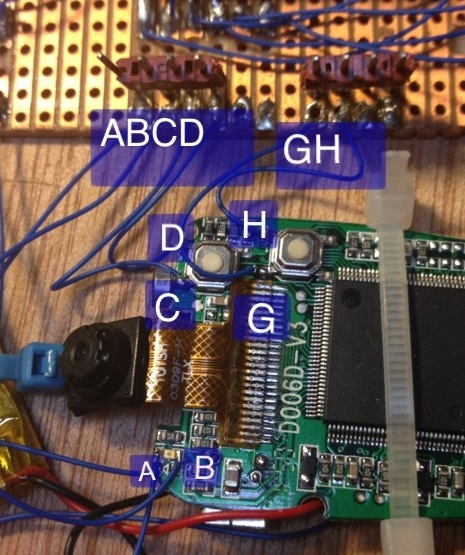
| Test Point | Off | On | Shutter Pressed |
| A | 0v | Pulse | 0v,Vcc,0v |
| B | 0v | Pulse then 1.9v | 1.9v,Vcc,1.9v |
| C | 0v | 0v | Vcc |
| D | 0v | Vcc | Vcc |
| G | 0v | Vcc when pressed | 1.1v |
| H | Vcc | Vcc | Vcc |
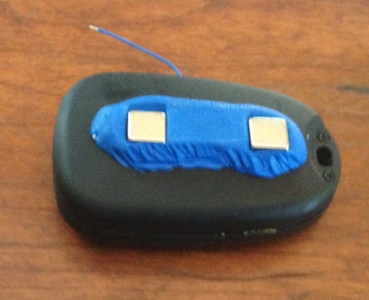
Here’s the underside of the Throwie showing a couple of rare earth magnets glued into some Sugru.
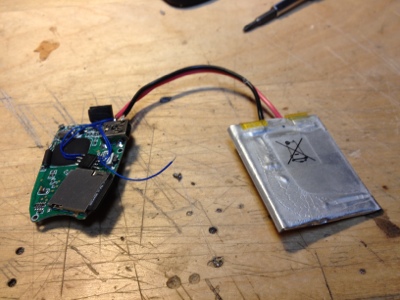
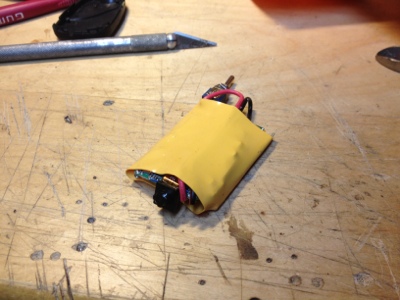
Sadly I think I was a little enthusiastic pushing everything together in the case and I damaged the LiPo battery, which swelled up and wouldn’t hold a charge. I swapped it out for a larger one I had and put them in heatshrink.
The new units I ordered behave slightly different from my first one and I’ll have to modify the code anyway.
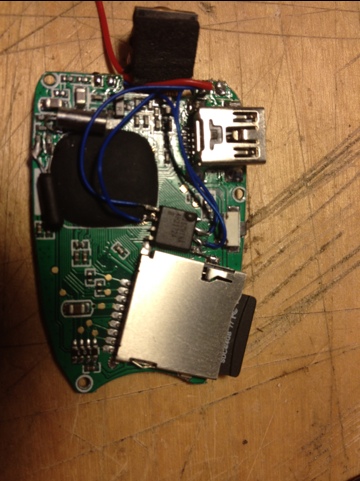
Here’s the ATTiny45 installed into the camera case, “dead bug” style. Btw the code for this is available at my Github repo.
Man they weren’t kidding about the 28 day shipping time. Anyway I hope to get one of these done over the weekend.
The software is complete and works the way I want. You can now stop and start the timelapse anytime. Once the units I ordered arrive I’ll do a video which shows how it all works.
I’ve modified the code so that the timing is now driven off of the internal counter/timer instead of using a delay loop. This means that the variable image processing time is at least partially resolved, at least while the image processing time
is smaller than the image capture interval. For instance if I have a 15 second capture interval then while the image processing takes less than about 12 seconds, it’s fine. After that the image capture interval grows.
I’ve also modified the code to have the chip wait for a button press on the power switch before it starts working. This means that you can charge the unit and not have it capture images until you are ready. It also tests the power button in between image captures so you can turn it off anytime. I’m not going to bother putting the chip to sleep between intervals since it only draws about 0.5ma when busy.
I think that’s about it for the features I wanted to put in. The next step is to put the Atmel into the case and put the camera unit back together. I have some units coming from Hong Kong so hopefully they’ll arrive soon.
Because the grass was already grown and the paint was already dry, here’s some ice melting.