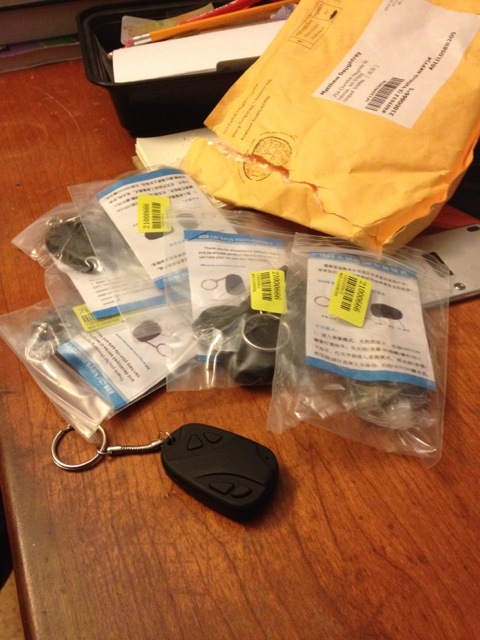
Yay my cameras arrived
Thursday, May 3rd, 2012Man they weren’t kidding about the 28 day shipping time. Anyway I hope to get one of these done over the weekend.
Man they weren’t kidding about the 28 day shipping time. Anyway I hope to get one of these done over the weekend.
The software is complete and works the way I want. You can now stop and start the timelapse anytime. Once the units I ordered arrive I’ll do a video which shows how it all works.
Today’s episode, “Floor”.

I’ve modified the code so that the timing is now driven off of the internal counter/timer instead of using a delay loop. This means that the variable image processing time is at least partially resolved, at least while the image processing time
is smaller than the image capture interval. For instance if I have a 15 second capture interval then while the image processing takes less than about 12 seconds, it’s fine. After that the image capture interval grows.
I’ve also modified the code to have the chip wait for a button press on the power switch before it starts working. This means that you can charge the unit and not have it capture images until you are ready. It also tests the power button in between image captures so you can turn it off anytime. I’m not going to bother putting the chip to sleep between intervals since it only draws about 0.5ma when busy.
I think that’s about it for the features I wanted to put in. The next step is to put the Atmel into the case and put the camera unit back together. I have some units coming from Hong Kong so hopefully they’ll arrive soon.
Because the grass was already grown and the paint was already dry, here’s some ice melting.
I have a version of the circuit that uses the LED signal to stay in sync. However I was thinking about my earlier statement that the timing was off and that’s why the system stops taking pictures after a while.
Wrong.
I noticed that after 30 or so pictures that the LED was taking longer and longer to go out (signalling image acquisition) after I sent the shutter signal. I think that what’s happening is the system is iterating through the existing files on the SD card to find the next filename to use, and as the files accumulate this takes longer. I’m going to explore this a little further but right now this would mean that any animation would slowly speed up!
[edit] maybe use a better card
The other thing I found came from the design of the testbed. I had a power switch handling the ATTiny and the camera circuit and I found that not all pictures were being stored. Additionally when I mounted the SD card onto my computer it would complain that the card had been improperly ejected.
I believe that the circuit is writing data to the memory card even after you’ve hit the power button and of course pulling the power at that point would leave the card in an indeterminate state.
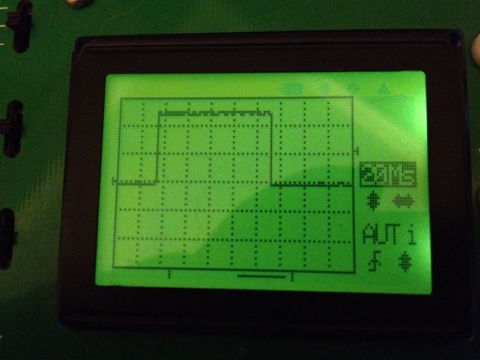
It’s hard to tell from the picture but the LED is on and this is mostly working. I say mostly because this is strictly a timed sequence and sometimes the unit can take a varying time to take a picture. This can be enough to throw off the timing and the unit ends up staying on most of the time and not taking any pictures. The solution to this is to monitor the LED status, so thats the next job.

Here’s the code:
while (1)
{
// Power On
PORTB |= _BV(3);
delayMs(100, 20); // 100ms * 20 times = 2s
PORTB &= ~_BV(3);// Shutter
delayMs(100, 10); // 100 ms * 10 times = 1s
PORTB |= _BV(4);
delayMs(100, 1); // 100ms * 1 times = 100ms
PORTB &= ~_BV(4);// Power Off
PORTB |= _BV(3);
delayMs(100, 20); // 100 ms * 20 times = 2s
PORTB &= ~_BV(3);delayMs(150, 100); // 150ms * 100 times = 15s
}
A short program running on the Atmel to verify operation
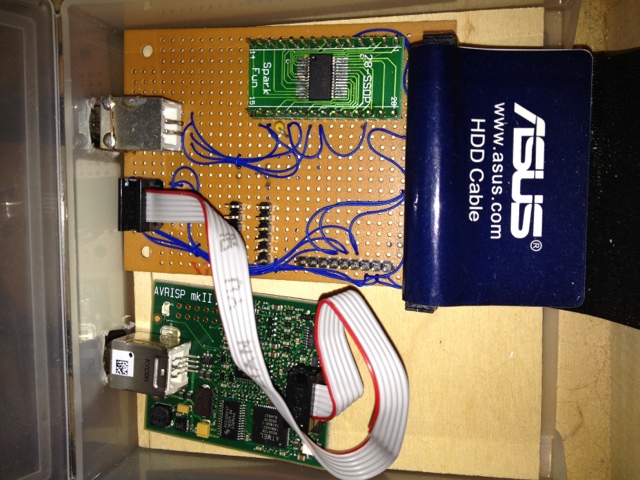
Here is the Attiny45 hooked up to the header which will connect to my programmer. Below that is the programmer itself. The perfboard integrates the AVR ISP and a USB-to-serial converter into a single header which I use for my ATMega169 development. This project is trivial enough that I can use my scope for troubleshooting.