A Mask For Every Occasion
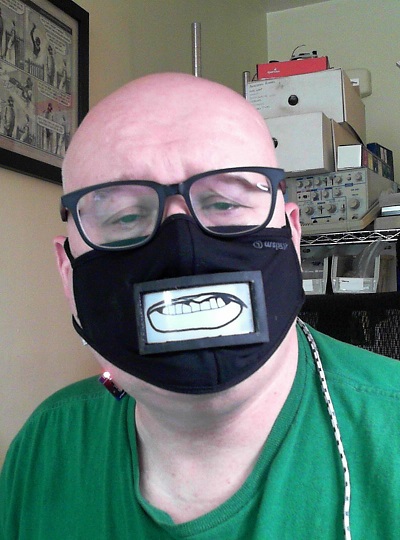
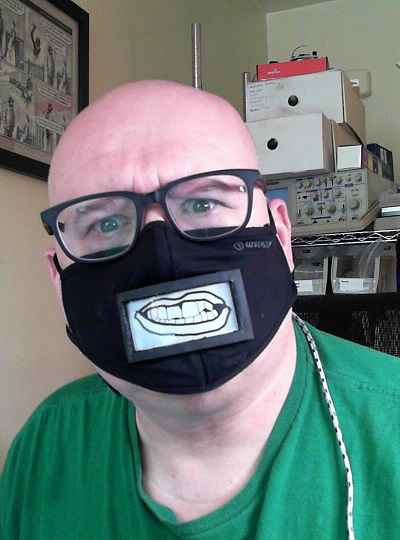
A mask-mounted e-paper display, controlled from your phone.
Mask Construction
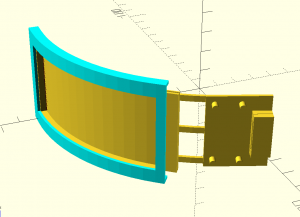
A fairly simple design done in OpenSCAD. It’s two parts; The cyan clip fits over the yellow assembly. The parts are printed in PLA so I glued the two parts together with dichloromethane solvent (available as Scigrip 16 at Amazon) and then cut the mask fabric out. The design file is here
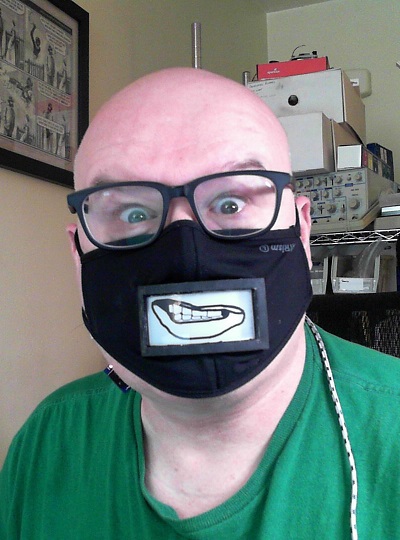
Display Installation
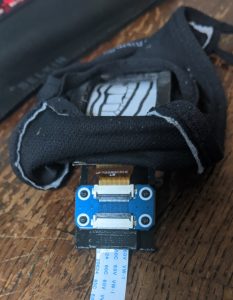
Here is the mounted e-paper display with an adapter board also acting as strain relief:.
E-Paper Display and Driver
The e-paper display is a 2.9inch flexible display from Waveshare and Aliexpress
That connects to an ESP32 E-Paper driver board (Aliexpress). It’s an ESP32-WROOM-32 module with connector hardware.
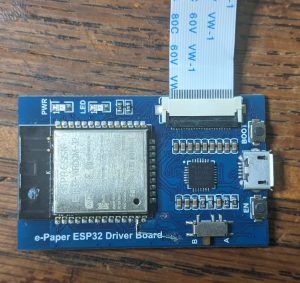
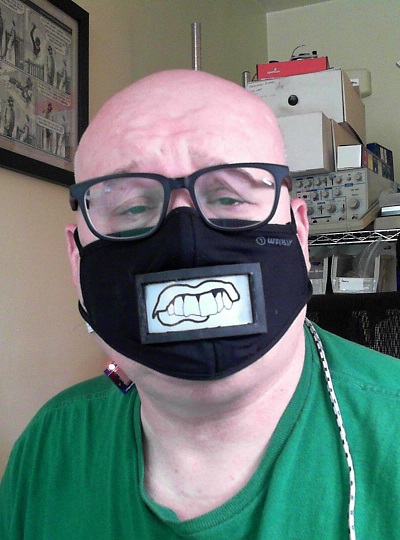
Image Preparation
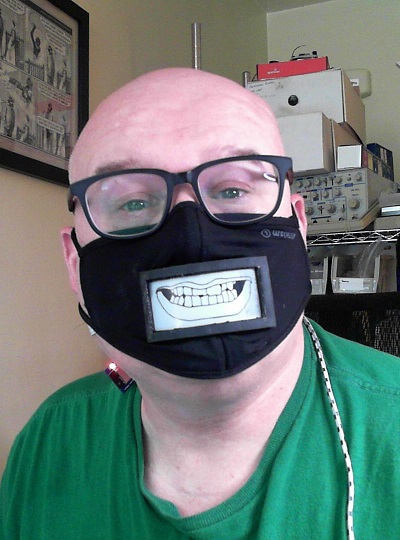
The e-paper display is 296 x 128. I couldn’t find any mouth images I liked on the net and I can’t draw mouths, so I took a picture of my own face, cropped my mouth and drew around it, then saved the result as a 1 bit BMP. I’ll spare you the original image, but here’s a processed example:
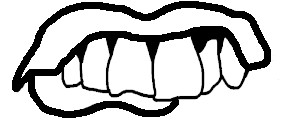
Once that’s done the image needs to be converted into a form suitable for inclusion into the code, and that’s done with a simple python script
#!/usr/bin/env python3

import os.path
import pdb
import sys
import scipy
from PIL import Image as PILImage
from PIL import ImageOps

def main():
    if len(sys.argv) == 1:
        print("need a picture")
        return 1

    filename = sys.argv[1]
    base = os.path.basename(filename).split('.')[0]
    img = PILImage.open(filename).convert('L')
    img = ImageOps.invert(img)
    img = img.convert('1')

    img.save("{}_1bit.bmp".format(base))
    dd = ','.join([hex(~x & 0xff) for x in img.tobytes()])
    open('{}.h'.format(base),'w').write('const unsigned char {}_data[] = {{{}}};\n'.format(base, dd))

main()
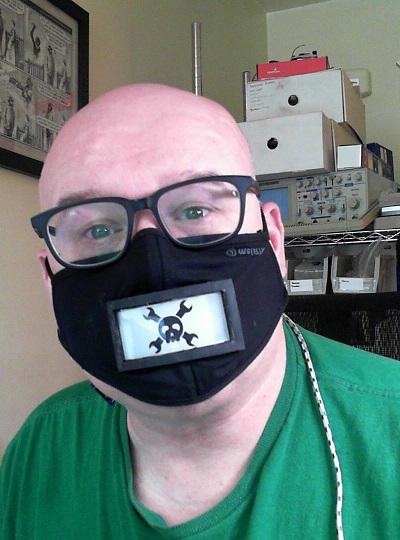
Then I copy the generated header files into the ESP32 environment and bind them in.
ESP32 Software
The code is a mixture of the BLE client sample code that comes with the BLE library, the proof of concept code for the e-paper display, and my own logic. I would have like to use the GxEPD2 library but it doesn’t yet support my display. Instead I’ve hacked up the sample code from github. The screen refresh is pretty rough still.
I used arduino-cli in a Docker container to develop the ESP32 code. The code is here
Phone Control Javascript
The ESP32 module runs as a Bluetooth Low Energy (BLE) client. This allows control from the phone. The phone app is written using phonk.app, which allows most of the phone functions to be accessed using Javascript. This system is a work in progress but it’s very useful already.
The communication between the phone and the ESP32 is a simple serial command interface; the ESP responds to a set of simple commands and displays the selected image.
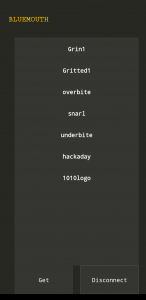
The phone code:
ui.addTitle('BlueMouth')

network.bluetoothLE.start()
var bleClient = network.bluetoothLE.createClient()

// -> Write here the BLE device MAC Address
// var deviceMacAddress = '24:6F:28:7A:5C:CE'
var deviceMacAddress = '4C:11:AE:79:8E:8A';
var serviceUUID = '6E400001-B5A3-F393-E0A9-E50E24DCCA9E'
var characteristicUUID_TX = '6e400002-b5a3-f393-e0a9-e50e24dcca9e'
var characteristicUUID_RX = '6e400003-b5a3-f393-e0a9-e50e24dcca9e'

function setResources(data)
{
var list = ui.addList(0.1, 0.1, 0.85, 0.8).init(
  data,
  function () { // on create view`
    return ui.newView('button')
  },
  function (o) { // data binding
    var t = data[o.position]
    o.view.props.background = '#00FFFFFF'
    o.view.props.padding = 50
    o.view.text(t)
    o.view.onClick(function () {
      bleClient.write(t, deviceMacAddress, serviceUUID, characteristicUUID_TX)
    }
  )
  })}

network.bluetoothLE.start()
// scan bluetooth low energy networks
// this should show devices -> services -> characteristics
var btn = ui.addButton('Get', 0.1, 0.9, 0.4, 0.1).onClick(function () {
      bleClient.write("list", deviceMacAddress, serviceUUID, characteristicUUID_TX)
})

// connect to a device
ui.addToggle(['Connect', 'Disconnect'], 0.55, 0.9, 0.4, 0.1).onChange(function (e) {
  if (e.checked) {
    bleClient.connectDevice(deviceMacAddress)
  } else {
    bleClient.disconnectDevice(deviceMacAddress)
  }
})

bleClient.onNewDeviceStatus(function (e) {
  // double check if is the device we want to connect
  if (e.deviceMac === deviceMacAddress && e.status === 'connected') {
    bleClient.readFromCharacteristic(deviceMacAddress, serviceUUID, characteristicUUID_RX)
    //txt.add('connected to ' + e.deviceName)
  }
})

bleClient.onNewData(function (e) {
  console.log("newData");
  var value = util.parseBytes(e.value, 'string')
  elems = value.split(',')
  if ("list" == elems[0])
  {
    setResources(elems.slice(1,))
  }
})


